How to Retrieve Targets
This is a very important topic. Retrieving targets so as not to make a mess or cause turf damage is critical for the longevity of our hobby, especially in public places. There are several effective techniques in retrieving a target you have detected with your machine. The two used most often by metal detector users looking for coins are "popping" and "plugging".
PoppingMetal detectorists who started detecting before the advent of electronic probe/pinpointers are generally well experienced in the art of probing and "popping" shallow coins. Early detectors generally did not get much depth, so popping techniques were adequate for most all target retrievals. Modern detectors have greater depth capabilities, so the plugging method has become necessary and more popular. For quickly retrieving coins from just under the surface to about 2" deep the popping method is the fastest and least invasive.
Metal detecting probes made of brass are made specifically for detecting. Brass is softer and less likely to scratch or damage a coin. With that caveat, I have always used a cheap, $1.00 variety 8" regular-tipped screwdriver from the hardware store. You can round off the blade or just the sharp points with a file, grinder or Dremel tool. The probing technique takes some practice, but once you've learned it, you can easily tell the difference between a metal object and a rock, tree root or even aluminum can scraps just by the feel of the probe. I describe coins as having a "tap-tap-tap" sound that other stuff in the ground just doesn't have. Obviously probing will not work well in especially rocky or gravelly areas.  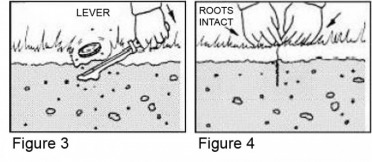 In the book Detectorist by Robert Sickler some great diagrams and explanation of the popping technique are given. Sickler's diagrams are shown above with a modified version of his instructions below.
"The probe used can be a non-metallic probe such as a modified fiberglass fishing rod or a metallic probe such as a blunted ice pick. A non-metallic probe will be the least damaging to the target. After pinpointing the target with your metal detector, use the probe to locate target depth (Fig. 1). Next, insert eight-inch screwdriver on center just above target and rotate slightly to open ground (Fig. 2). Now insert screwdriver just under target at an angle and lever target to surface (Fig. 3). Brush all loose dirt back in the hole and close by exerting pressure all around opening (Fig. 4)." Another technique I should mention when the coin can be pinpointed with the probe (or screwdriver) but is too deep to be popped out with the probe alone is outlined below. 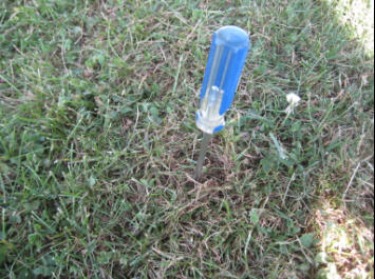 Locate the object and leave the probe in place. 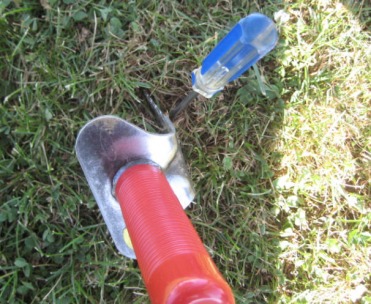 Cut a slit over the top of the object, leaving the probe in place over the item. 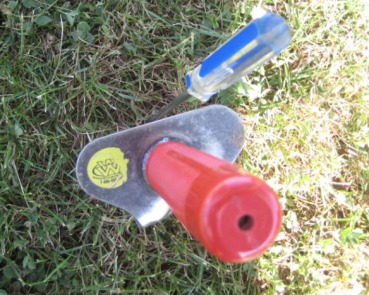 Insert the bladed digging tool at one end of the slit, deep enough to get under the item. 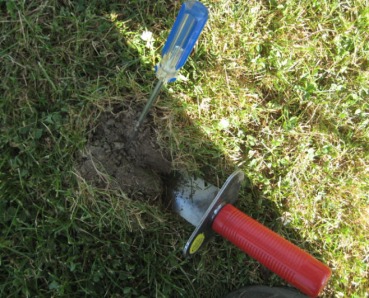 Pry upwards and the probe and the object will be raised to the surface. 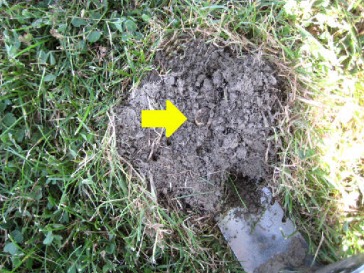 Probe has been removed and a coin is at the surface, easily picked up. 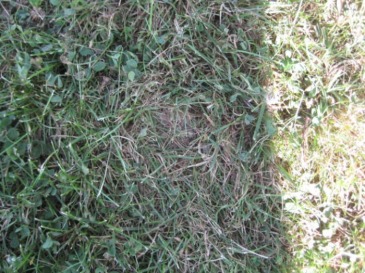 Remove the bladed digging tool and press the slit back down and together. Having a probe or screwdriver handy is also useful in locating a target that is under roots or otherwise hard to retrieve. The thin shaft of the screwdriver can get in between roots so that you can locate the exact position of the target, or even help nudge it out from between the roots.
A great essay about probing and popping can be found here: http://www.thomasathomas.com/Using_A_Metal_Coin_Probe_along_with_your_metal_detector.htm Plugging
There are many types of hand tools made for making plugs or divots to recover objects located with a metal detector. The one pictured at left is a Lesche tool and is one of the most durable and effective I have used. It fits handily and discreetly in the back pocket of my jeans. Others prefer garden trowels, tools shaped like garden trowels and some even make their own tools. There are also bulky plugging tools somewhat like a caulking gun on steroids that extract a round cork-like plug.
A good tutorial with pictures is at the Sacramento Valley Detecting Buffs website. The Lancaster Research and Recovery Club of Pennsylvania also has a great pictorial of the proper plugging or divot technique on their website.
You may visit their website, or here is a copy of their tutorial: "The following is a step-by-step instructional on how to properly extract an item from the soil. It is just one method that is suited for digging up items from grass, fields or lawns. It is wise for a beginner to learn and is widely used by many detectorists in the field. It is vital to anyone who metal detects on private land or public land that they practice clean and neat digging habits so that "non-metal detectorists" do not tarnish our reputation because of careless and reckless digging techniques. 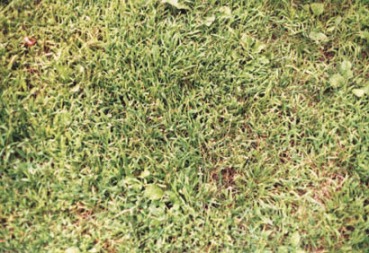 1. This is how the ground looks before you dig a hole or "plug".
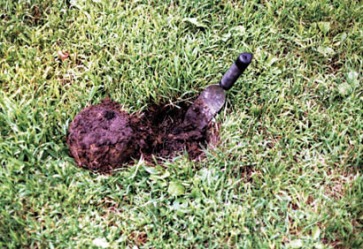 2. Push the digging tool into the ground about 4 inches deep, this way you will get all the roots to the grass and prevent damage. Cut a plug of grass in a semi-circle and pry it upward with the tool causing a hinge on the uncut side of the circled plug of grass. Note: If you do not do this properly, you will cause the grass to turn brown in that spot and it could take weeks for it to recover. If you have been given permission to hunt a site and you do not do this properly, chances are you will not be welcomed back.
 3. Now use a cloth (called a "drop cloth") to pile your soil on. This keeps the dirt from soiling the neat grass around the hole and you can also grab the corners of the drop cloth and pass the dirt over top of your coil to see if the item was in the dirt you extracted from the hole. Your item may be a deep target and this method allows you to dig very deep while keeping everything neat and orderly. Now you can also sweep your coil over the hole and the pile of dirt separately to better locate the item.
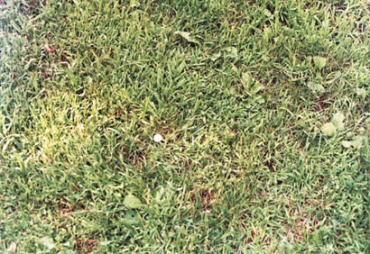 4. After you find your item, take the cloth to the edge of the hole and dump the dirt back in and pack it down. Now you should flip over the plug back into the hole (grass side up of course!). Then lightly stomp or press the plug of grass so that it is level or even with the the surrounding surface. You may even want to take your fingers and run them through the grass to groom it like you would with a comb or brush. No one should be able to tell that you just disturbed that area."
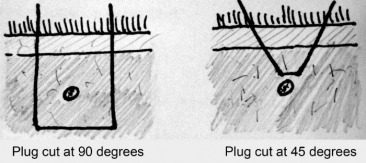 One last note about plugging in hot and dry conditions. Straight sided deeper hinged plugs stand an excellent chance of surviving. Shallow plugs cut at 45 degree angles and/or not hinged are sure to die. Be mindful of how you dig and make adjustments for the prevailing conditions.
Plugging Video
This is one of the better videos I found online. One very important item counter to the technique demonstrated in this video is do not cut a full plug! Leave it hinged on one side to improve the chances of grass survival. Shallow targets, 1" to 2" deep should be probed and recovered without plugging or "popped". Shallow plugs are also easily pulled up by lawn mowing equipment, another reason not to dig a shallow 45 degree plug. Lastly, don't rub old silver coins in the field as this will damage the surface of the coin with hairline scratches (for more on scratches, see my blog post on cleaning silver coins.)
Carter Pennington makes it look easy, as he is an experienced detector user and can pinpoint well with his detector. Learning to pinpoint with your machine takes practice. The electronic probe is a big help too in make a fast neat recovery. Important points covered in the video: 90 degree vs. 45 degree plugs Deep vs. shallow plugs Neatness, use of dropcloth Use of electronic pinpointer |
Tools and GearYou can make your metal detecting kit as complicated or as simple as you like. I started out simple, made it complicated and then went back to simple.
At a minimum, you should have your detector, headphones and retrieval tool. My electronic Sun Ray electronic probe/pinpointer is attached to my detector. I typically also carry an 8" screwdriver to use as a probe and a pouch for finds and trash. The digging tool and screwdriver fit neatly in my back pocket. I also carry a cell phone for emergencies. In the car I keep a spare battery pack. There are many other items you can consider using or including in your kit. Mostly it is a matter of personal preference or the requirements of your site. A few items that come to mind are:
 PinpointingNarrowing down the location of your target can be tough to learn. It gets easier with practice. Each machine is different, so I encourage you to search the internet for pinpointing tips for your specific make and model of detector. Most modern detectors have a pinpoint function that also makes pinpointing your target much easier.
Even with the built in pinpointing feature, one technique I still use and that works for almost all machines is X-ing the target. If you get a good signal, visually mark a vertical line and then scan the target at a 90 degree angle to that vertical line. You have now just made an X and the target should be located in the center. Another way to practice pinpointing is to bury a coin a few inches deep and mark on the surface the location of the coin, perhaps with a golf tee pressed nearly flush to the ground. Practice sweeping over the coin and see how close you can pinpoint the coin - the tee or marker will tell you how accurate you are. Something else to remember too is that coins on edge or at an angle to the surface will often not pinpoint where you think they will. They may give double beeps, seeming like two targets, or will pinpoint to the side rather than the center of the hole. This is one instance where a handheld pinpointer, like the popular Garrett Pro-Pointer will save you a lot of time searching for the item in the hole. The video below demonstrates the X method, as well as using the detector's pinpoint function and using a handheld electronic pinpointer. Please though, do not use a large shovel as shown at a public site such as a park or school. |

|
|
